If you run a video website, you must notice that sometimes, especially when the web speed is slow, your clients will not be able to watch the video immediately. They will leave and it really brought very bad impact to your website and your wallet. So how can we resolve this problem? A preloader really helps a lot. When people can not watch video immediately, they will be attracted by the beautiful preloader.
Well, how to make a SWF preloader for your web video? This article will show you the perfect way to add and create preloaders to your flash videos for online delivery. And you will also find the way to create one by yourself.
Firstly, I will teach you to create a preloader with Flash 8
Step1. Create the "loading bar" and the "dynamic text field".
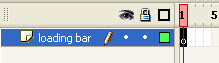
Open a new Flash document. Name the first layer loading bar.
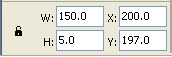
Select the Rectangle tool (R) and block the Outline color. Draw a 150 by 5 pixel rectangle and center it on stage. I suggest that you adjust these values by entering them in the appropriate fields in the Properties panel. You’ll find the width (W) and height (H) input fields in the bottom left part of the aforementioned panel.
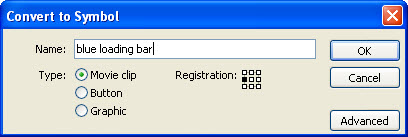
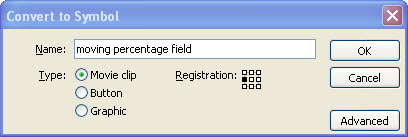
Select the rectangle by clicking on it with the Selection tool (V). Select Modify > Convert to Symbol to make a movie clip out of your rectangle. In the dialog window that appears, select Movie clip as type and call it blue loading bar. In the registration portion of the Convert to Symbol window, click the middle left rectangle (see it on the image below).
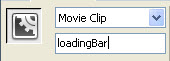
With your newly made movie clip still selected on stage, go to the left side of the Properties panel below the scene and assign it an Instance name. Call it loadingBar.
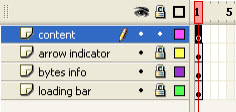
Lock this layer. Make a new one and call it bytes info.
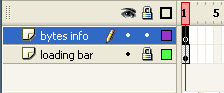
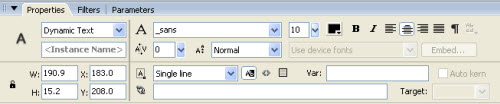
Select the Text tool (T). Go to the Properties panel once again, and select the following properties for your text field:
1. Set the type to "Dynamic text".
2. Select "_sans" as font type (it should be on top of the fonts list).
3. Select the "central alignment" for your text field.
4. Select the "Use device fonts" option.
5. Leave the "selectable text" option turned off.
Click and drag out a text field just below the loading bar. Hit Esc to exit text editing mode.
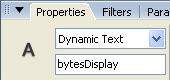
Give this field an Instance name, otherwise you won’t be able to tell it what to display via "ActionScript" commands. Call it bytesDisplay. Lock this layer.
Step2. Creating the text field with percentage information that is going to be animated.
Make a new layer and call it arrow indicator.
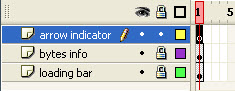
Draw a small triangle just above the loading bar’s left edge.
If you don’t know how to create a precise little triangle like the one in the image above, I’ll show you quickly how to do it here:
1. Draw a borderless square with the Rectangle tool (R) by holding Shift while clicking and dragging your mouse.
2. Rotate the square by 45 degrees with the Free Transform tool (Q).
3. Select the Line tool (L) and draw a line from the square’s left to its right point. To do this exactly from edge to edge, be sure to have the Snap to objects option turned on (the small magnet icon at the bottom of the Tools panel).
4. By using the Selection tool (V), select the upper portion of the rectangle and hit Delete.
5. Select the line and erase it too.
With the triangle still selected, press F8 (or select Modify > Convert to Symbol) to convert it to a movie clip. Call it moving percentage field and make sure that the registration point is on its left middle side.
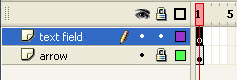
Double-click on the newly made movie clip on stage to enter inside it. Call this layer arrow. Select the triangle drawing and move it so that its bottom point is centrally aligned below the movie clip’s registration point. Lock this layer.
Make a new layer above it and call it text field.
Select the Text tool (T), click and drag to create a small text field just above the triangle. Leave all the properties for the dynamic text field the same as they were for the first one you created. Just make a small adjustment: set the alignment for the text field to left. Give this text field an Instance name: call it percentDisplay, and lock this layer. Click on the Scene 1 link above the layers to return to the main scene.
Use the arrow keys to adjust the position of the moving percentage field movie clip. Place it where the "blue triangle" points at the "loading bar’s" left edge.
Finally, give this movie clip an Instance name: call it percentClip. Lock this layer.
Step3. Place in the site content.
Make a new layer on top of all the existing ones and call it content.
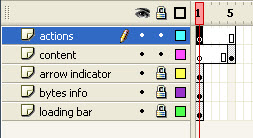
Right-click frame 5 of this layer and select Insert "Keyframe" from the menu.
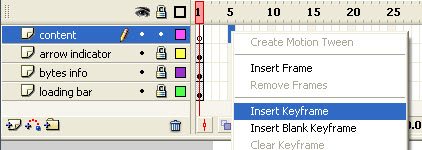
You should place some content here now. The best thing to simulate content is an image. Select File > Import > Import to Stage. Select the picture you want to import and click Open. The picture will appear on your main scene.
Step4. Make a new layer and call it actions.
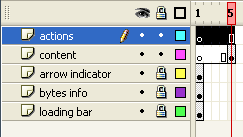
Select the first keyframe of this layer by clicking on it.
Step5. Finally, test your movie by selecting Control > Test Movie. The site will load instantly, of course, because it loads straight from your hard disk and not from some web server. To see the preloader in action, execute the next step.
Still in test movie mode, select View > Download Settings > 56K. This will set the simulated speed of download to a standard (slow) 56K modem.
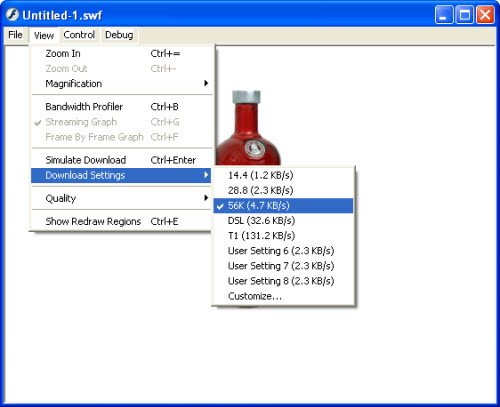
And then, select View > Simulate Download. You will now see the preloader at work!
Do you think it is too complicated? Well, this method is suit to professional users, as you need to know ActionScript first. But to many people who don’t know ActionSript, I suggest you to use Flash Video MX Pro, because it can help you to add preloader directly.

No comments:
Post a Comment